
If you have been trying to make money for over a day, I am sure someone told you that money is on the list.
To build a list, you need to have a squeeze page. Today, I will show you how to create a squeeze page in HTML.
What is a squeeze page?
How do you use a squeeze page?
Squeeze pages are one of the most powerful tools in an online marketer’s toolbox. People will visit your blog or social media and leave; there is no way to contact them. But if you do want the possibility of contacting them again, you need to ask for their email address.
What are squeeze page examples?
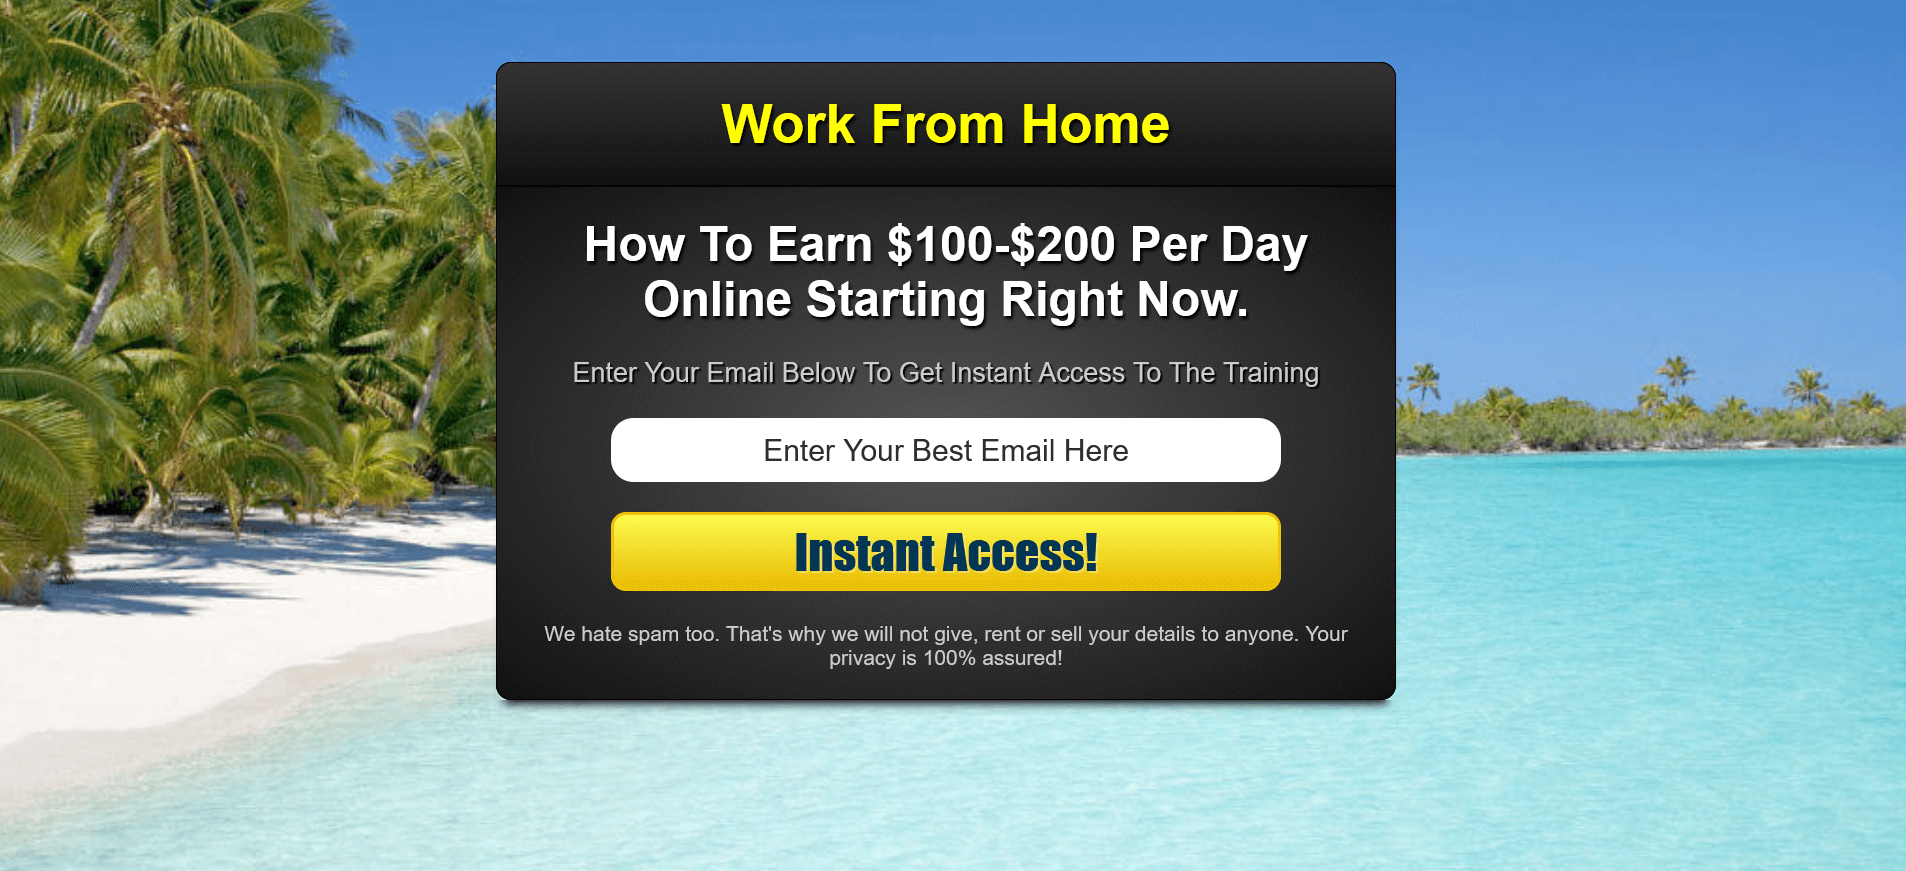
Work From Home Squeeze page.

How do I make a squeeze page in HTML?
To make a squeeze page in HTML, you will need a few things: a place where you can host your files (web hosting), a domain name, an autoresponder ( you get this for free with Aweber), and a file editor, this is free too.
I will provide you with an existing HTML file that is pre-coded. All you need to do is edit some information, make it yours, and upload it to your hosting.
Tools Needed
You’ll need:
- A text editor like Notepad ++
- A domain you
- Hosting host the squeeze page (I recommend WPX)
- Aweber account
- I will give you an HTML file and show you how to edit it.
How to create a squeeze page in HTML in 8 steps
STEP 1:Get a domain name
This is your address online. My recommendation is to get a .com domain name. It should be short and easy to remember. You can use your name for this.
My domain name, for example, is sekihudson.com. It’s where anyone can find information about me and content.
Get a short and easy-to-remember domain name. My recommended site for buying domains is http://namecheap.com.
Step 2: Get a hosting account
A hosting account is what connects your domain to the internet space. It’s where all the data presented on your domain is stored.
I use WPX to host all my sites, and I highly recommend them.

Then, you need to install WordPress to your hosting and connect the hosting account with your domain name. I will add a video here on how to do it.
Step 3: Get your autoresponder account
You must get an autoresponder. This is the software you will use to store and send emails to your subscribers. The Autoresponder I use is Aweber.

After you create a free account, they will send you a confirmation message. Click on the confirmation link, create a password, and log in. Follow the instructions to set up your account.
After logging in, click on the sign-up forms and then click on the create a sign-up form.
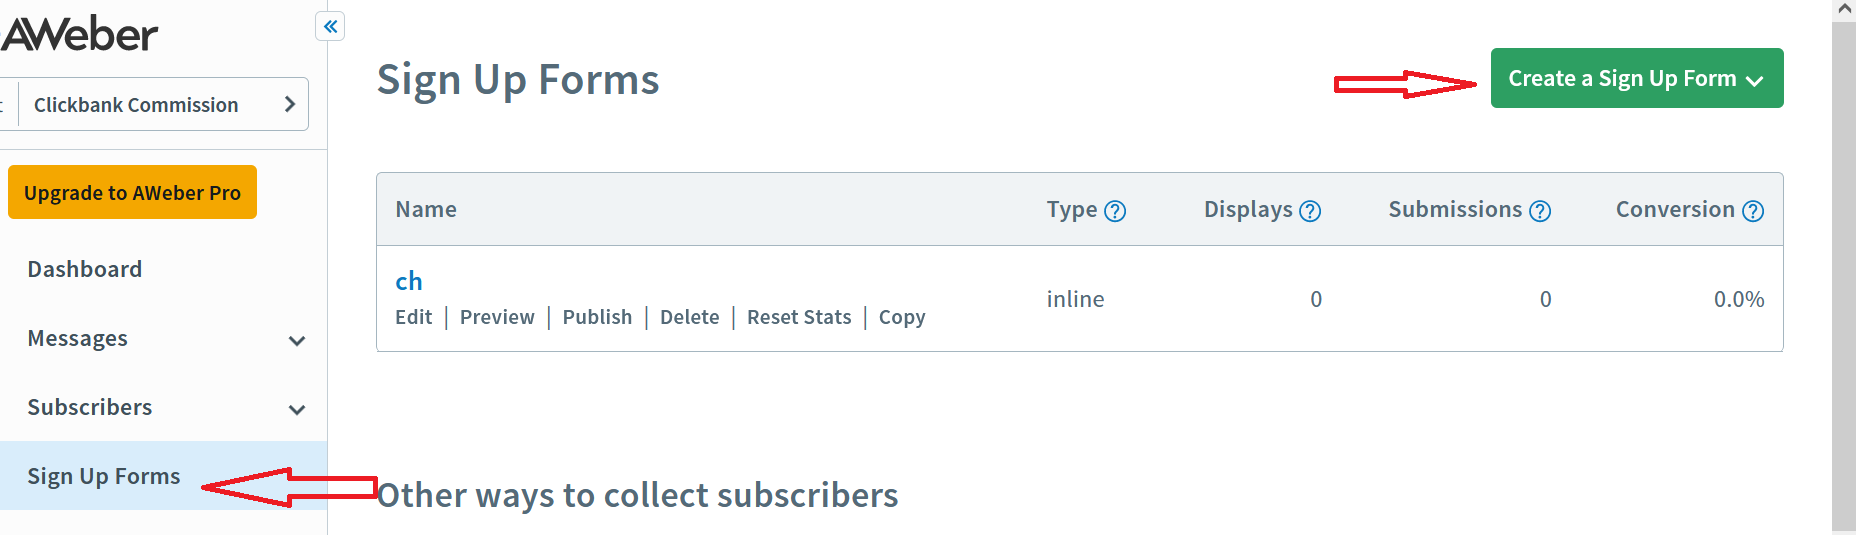
Choose a basic form. You do not need to edit it. Click next, then save the form.
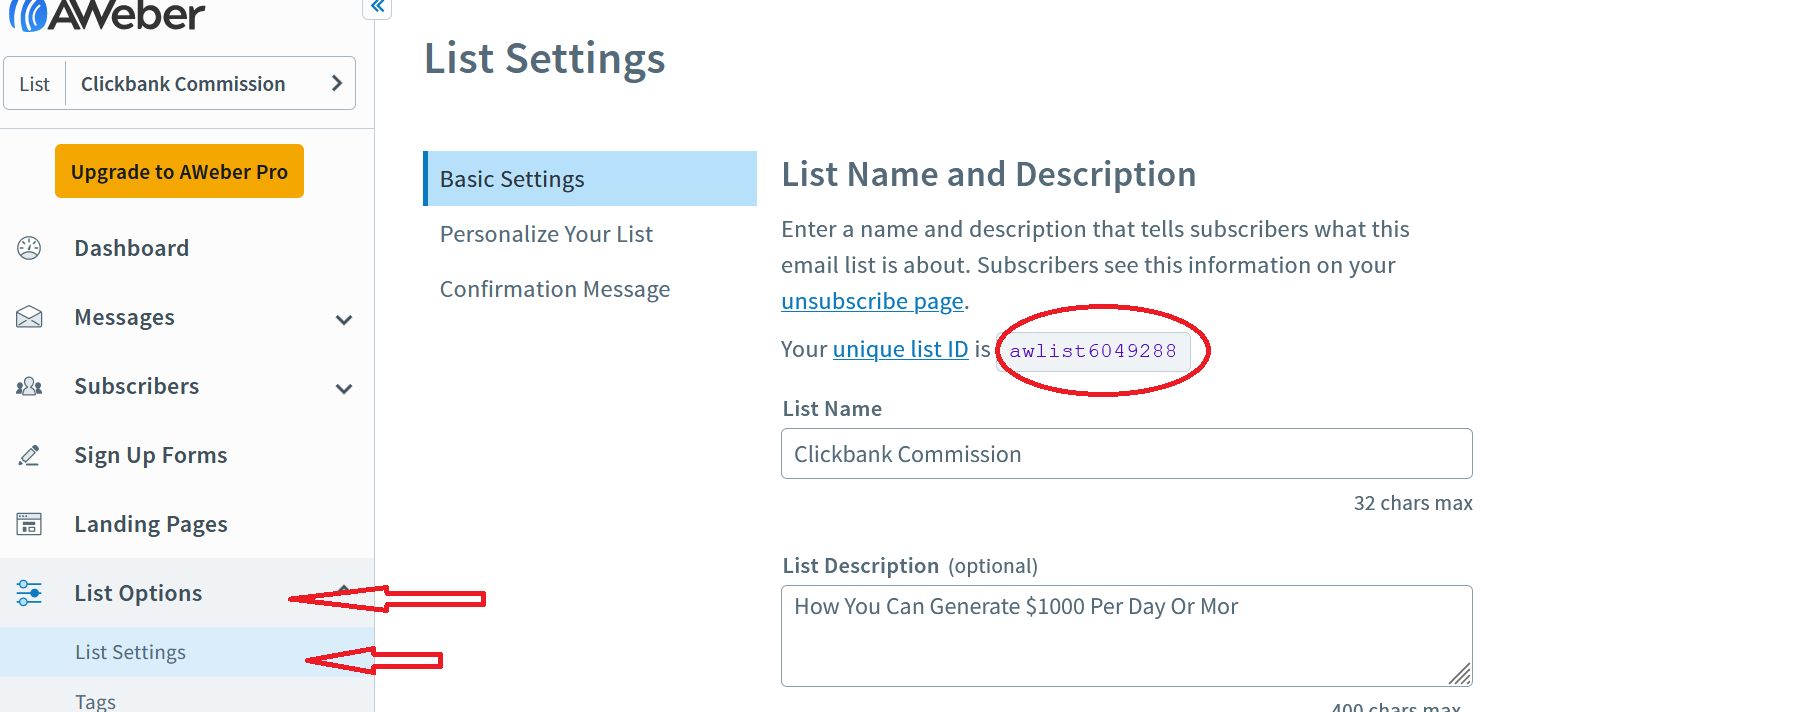
Now click on the list option, then click on list settings. You only need to copy your unique list ID in the red circle. It starts with awlist, copy it and paste it into a notepad.
Step 4: Download the HTML editor and install it on your computer
Go to the Notepad++ website, download the editor, and install it on your computer.
Step 5: Download the HTML file
As promised, I am going to give you the HTML file. Click here to download the files. Just right-click the zip file you just downloaded and unzip it.
Step 6: Edit the HTML file
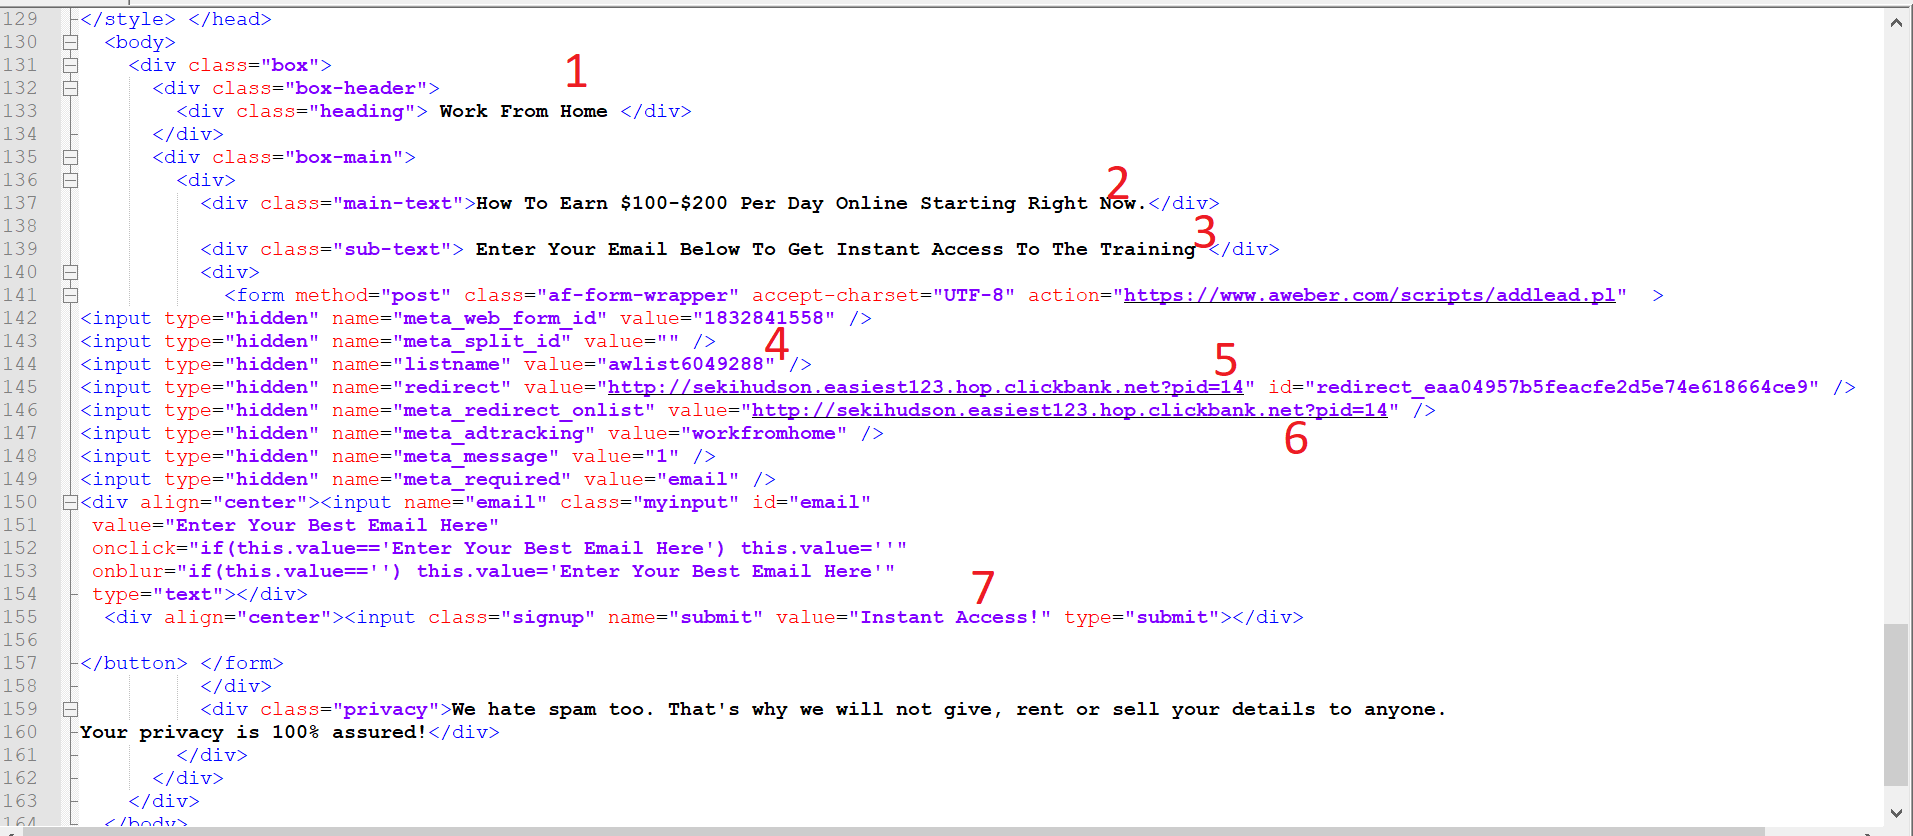
Open the file. You will find a file named index.html, right-click it, and then select edit with Notepad++.

After opening the index file, you need to edit it; do not worry. You do not need to be a programmer to do this. Just follow my red numbers.
Step 7: Change the background image.
Step 8: Upload the files to your hosting